Jeep MG Mutator Tutorial
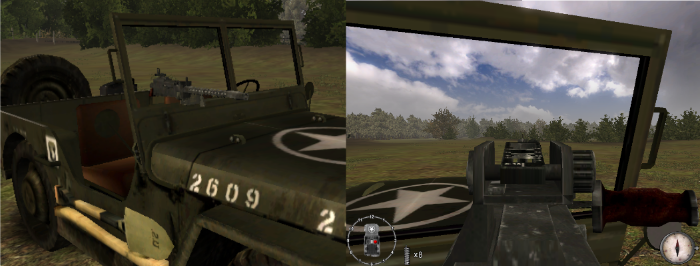
This tutorial will teach you how to make a Willy’s Jeep with a .30cal Machine Gun attachment. Please note that this tutorial is slightly more advanced than the Parachute Mutator Tutorial, primarily because it consists of multiple class files and I will not spend as much time analysing every bit of it.

This package will consist of the following classes:
- DH_JeepMG
- DH_JeepMGFactory
- DH_JeepMGGun
- DH_JeepMGGunPawn
While that may seem daunting, each class has only 6-8 lines.
Creating the Package
In this tutorial, we’ll create a package/directory called DH_MyVehicles. You should already know what a package is and what it should consist of (e.g. the Classes folder) from the Parachute Mutator Tutorial.
Examining the Source
To find what we need to change, we will decompile DH_Vehicles and examine DH_WillysJeep.uc. As you can see, there is a lot of code in that file, but we don’t have to worry about all that because we will be extending this class, so our jeep will get all of that code automatically. We just need to find what we want to change.
In the defaultproperties at the bottom, there are a few lines labelled PassengerWeapons. By default, they set the WeaponPawnClass to a simple passenger class. But if you look at the same section of DH_M3A1HalftrackTransport.uc, you’ll see that PassengerWeapons(0) uses a weapon pawn class instead of a passenger class - DH_Vehicles.DH_M3A1HalftrackGunPawn. So if we want the MG from the Halftrack on our Jeep, we can just copy that over to our new jeep.
DH_JeepMG
The first class we will create is DH_JeepMG, which we want to base off of the already existing jeep, DH_WillysJeep, because we want it to be that jeep, just with an MG added.
class DH_JeepMG extends DH_WillysJeep
Having identified the defaultproperties we want to change, we will add those to our class.
defaultproperties
{
    PassengerWeapons(0)=(WeaponPawnClass=Class'DH_Vehicles.DH_M3A1HalftrackGunPawn',WeaponBone="body")
    PassengerWeapons(1)=(WeaponPawnClass=Class'DH_Vehicles.DH_WillysJeepPassengerTwo',WeaponBone="body")
    PassengerWeapons(2)=(WeaponPawnClass=Class'DH_Vehicles.DH_WillysJeepPassengerThree',WeaponBone="body")
}
Notice we have not included any of the other default properties, because they are automatically inherited by our class since it extends DH_WillysJeep. In fact, you don’t even need to include the PassengerWeapons(1) or PassengerWeapons(2) lines, since we’re only modifying PassengerWeapons(0); but we’ll include them for now anyway (can’t hurt) in case you want to add, say, a Flak88 cannon onto them later.
DH_JeepMGFactory
In order to use our jeep, we will need to add it to a map. The way maps work with vehicles is they have Vehicle Factories, which basically spawn the actual Vehicle at regular intervals. The DH_WillysJeep has its own factory, DH_WillysJeepFactory, so we’ll just extend that and make it spawn our jeep instead.
class DH_JeepMGFactory extends DH_WillysJeepFactory
By examining the few lines of DH_WillysJeepFactory, we see that it sets which vehicle it spawns with the VehicleClass default property. So we copy that to our class and change it to our jeep class.
defaultproperties
{
    VehicleClass=Class'DH_MyVehicles.DH_JeepMG'
}
The Positioning Dilemma
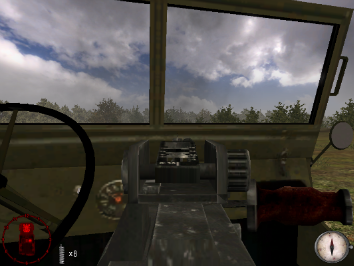
Oh, if only it were that easy. If you compile your package now and place one of your new DH_JeepMGFactory classes on a map, you will have a Jeep with an MG in the passenger seat, but it is positioned in such a way that was intended for the Halftrack - it’s centred, and too low.

So instead, we will extend DH_Vehicles.DH_M3A1HalftrackGun and reposition it.
DH_JeepMGGun
If we examine DH_M3A1HalftrackGun, we see that the Mesh (the in-game MG model) is set here. This is where we want to change the positioning. So we want to extend this class.
class DH_JeepMGGun extends DH_M3A1HalftrackGun;
By looking at various other classes, you could discover the property that sets that. But to save you the trouble, it’s PrePivot. Furthermore, it is literally guess work trying to figure out what to offset the Mesh by. Again, to save you the trouble, I’ll just tell you.
defaultproperties
{
    PrePivot=(X=23.0,Y=30.0,Z=17.0)
}
So we’re offsetting it by 23.0 on the X-axis, 30.0 on the Y-axis, and 17.0 on the Z-axis. Again, coming up with those numbers was trial and error.
The problem we have now is that our Jeep is not actually using this DH_JeepMGGun class we’ve created. Remember, we’re personally placing the DH_JeepMGFactory class in the map, and that class uses DH_JeepMG as the actual vehicle, but we haven’t told the vehicle to use this gun. If you notice, the PassengerWeapons(0) setting we changed in DH_JeepMG referred to a ‘Gun Pawn’ instead of just a ‘Gun’, which we’ll have to create.
DH_JeepMGGunPawn
A Pawn class is merely an Actor that a player can control. The best way to explain this is that it is like a soldier’s body. The game can assign a Player on the server to control that body pawn. If that player enters a vehicle, the game assigns the Player to control the vehicle pawn. In this case, since the vehicle has multiple seats, there is a pawn for each seat. The driver pawn actually gives the player control over the vehicle’s movement. In this case, the DH_M3A1HalftrackGunPawn gives the player control over the MG Gun.
Since we want to change the Gun that the driver has control over to our gun, we’ll extend DH_M3A1HalftrackGunPawn.
class DH_JeepMGGunPawn extends DH_M3A1HalftrackGunPawn;
By examining DH_M3A1HalftrackGunPawn, we can see that it sets the GunClass as DH_Vehicles.DH_M3A1HalftrackGun in the default properties. We will copy this over and change it to our gun class, DH_JeepMGGun.
defaultproperties
{
    GunClass=Class'DH_MyVehicles.DH_JeepMGGun'
}
Important: Now that we have our own Gun Pawn class, we need to change the original DH_JeepMG class so the Passenger uses our Gun Pawn. It should now read:
PassengerWeapons(0)=(WeaponPawnClass=Class'DH_MyVehicles.DH_JeepMGGunPawn',WeaponBone="body")
Adding to a Map
After compiling, the final step is to add your new DH_JeepMGFactory to a map and test it out. I cannot imagine explaining how to do that via text, so this screen cast will have to do.
(Note that this does not technically use a Mutator, so you do not have to ‘Enable it’ in-game - just add it to a map)